8 Ways to Download Any Video from the Internet

If you wish to download any video from the internet, there are various tools available for the downloading. You don’t have to search for the particular videos in your device and instead access them directly once you download. From Facebook to YouTube to plenty of other websites, you can easily create a copy of the favorite videos easily in your device.

Ways to Download Any Video

Here are the best tools for downloading videos online:

1. SaveFrom

SaveFrom is widely known for downloading YouTube videos, but you can download videos through other websites also. You need to copy the link of the video and paste in the asked section for downloading or enter “ss” right ahead of “YouTube” for downloading YouTube videos. It is a great web tool or trick for downloading videos online.

2. FastestTube

Another great YouTube downloader is FastestTube. It is a free browser extension that works perfectly with various browsers such as Opera, Internet Explorer, Safari, Firefox, and Chrome. Through FastestTube, you can add a download button on YouTube. The download option will be shown to you on the bottom right section of the video.

3. KeepVid

You must know that KeepVid is one of the best web apps, which no longer allows downloading YouTube videos now. But you can download videos from 28 other sites. The websites include educational resources such as Lynda, news platforms like NBC and ABC, and amusement sites like Break and Ebaumsworld. After you copy and paste the web link in the dedicated column, you get the option to download the particular file in around 150 various formats.

4. VideoGrabby

VideoGrabby is also an ideal web app that allows you to download videos online. It can download video from major video sites with ease. You need to enter the video link and click Go for downloading.

5. VLC Media Player

Desktop apps provide you better features than web apps and ideal for downloading videos as well. You need to play the video from any link by going to File option and then Open Network Stream. Once you paste the copied video in the required section, the video will start playing. For download, go to Tools, then Codec Information and select the available text from the bottom part for copying. After copying, you need to paste the selected text in the browser. When the videos start playing, right-click and choose Save Video As for saving it in your device.

6. Video Grabber

Video Grabber might look like a web app, but it is a desktop program. It lets you download video, convert video, and even record your computer screen. Its screen recording feature can be beneficial for you at times.

7. Open Broadcaster Software

If you want to screen recorder for recording any that plays on your computer, Open Broadcaster Software is an ideal option for you. It comes as a free screen app and is simply one of the best apps. You can access it on Mac, Linux, and Windows. Also, it provides powerful editing tools to users.

8. CamStudio

The user interface of CamStudio isn’t that exciting, but it is no less than OBS. Using this screen recorder is very simple. You need to hit the Record button and don’t have to stress about anything else.

So, these are the best tools for downloading internet videos. You can only download free videos without any copyright. If you try to use and distribute the downloaded videos with copyright, you might get into a severe problem!

Joey Williams is a Microsoft Office expert and has been working in the technical industry since 2002. As a technical expert, Robert has written technical blogs, manuals, white papers, and reviews for many websites such as office.com/setup.

Source : Ways to Download Any Video

How to Discover New Music on Apple Music

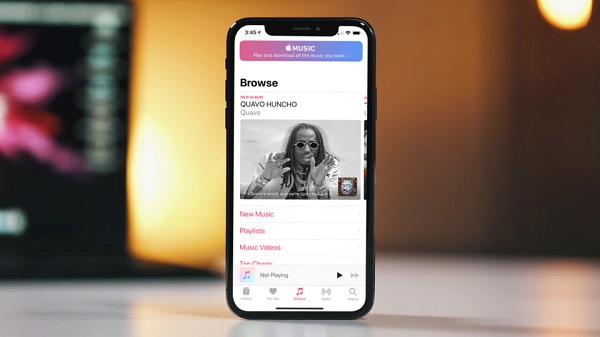
Apple Music consists of a massive amount of songs and music albums. It is used by millions of Apple users worldwide for listening to their favorite music. You even have to pay a dedicated amount for using it – after the trial period ends – but it is worth it. From old classics to new music, you can enjoy everything perfectly with this app. All these things make it one of the best music streaming services. Here are the ideal ways to discover new music in Apple Music.

apple-music

1. Explore the Intro To playlists

Apple Music is undoubtedly the best spot for finding all type of music. Go to the search section in Apple Music and select the ‘Intro to’ playlists that are curated by Apple’s music editors. For example, if you want to listen to Bob Dylan, choose the Intro to Bob Dylan playlist for discovering the best music from him. Though there are plenty of playlists available for you over there. You can choose the one that you like to get started with a new artist or music.

2. Keep updating your song library

The songs that you search, love, and add in your song library in the app matters the most. Because Apple Music gives you music suggestions according to that, regardless of selecting your favorite genre in the app. Hence, it is essential to keep doing the same. The more you explore the Apple Music app, the better the music suggestions you will get. You need to refresh the For You Section in the app as the music suggestions will be available there for you.

3. Explore playlists according to mood and by magazines

You can check out the playlist of influential music magazines like Rolling Stone to hear the hottest tracks in recent times. Also, there are playlists according to the activity that you are doing currently as well. Go the Activities option and choose the ideal playlist to listen to music while working, relaxing, or even working out.

4. Listen to Beats 1

It is easy to find a lot of good new tracks buzzing around through Beats 1. You can add the song to your music collection through a few easy steps by listening to it. From hip hop to electronic to country, all type of music is played non-stop on this 24/7 station. The best thing is you get no ads and chats between artists and the hosts are pretty entertaining too. There are various other streaming radio stations for exploring new music.

So, these are some of the best ways for discovering great new music on Apple Music.

Joey Williams is a creative person who has been writing blogs and articles about cybersecurity. He writes about the latest updates regarding mcafee.com/activate and how it can improve the work experience of users. His articles have been published in many popular e-magazines and blogs.

Source :  

How to Unlink Your Phone Number from WeChat

To verify your WeChat account, you have to link a phone number to the WeChat ID. After linking a mobile number to the WeChat account, you cannot unlink it without replacing it with another phone number or removing the WeChat account. In case you still want to unlink your phone number from WeChat account, then follow the instructions mentioned below.

wechat

Steps to Unlink Your Phone Number from WeChat

•    Go to the WeChat application on the computer or mobile device.

•    It resembles a two speech bubble given on olive color background.

•    You will get the WeChat application on the home screen.

•    In case you are getting the conversation menu on the screen, then press on the ‘Black” option to go back to the menu list of all the conversations.

•    Press on the Me option located at the end right-hand side of the display.

•    Press on the Settings option provided at the end of the WeChat profile list.

•    Press on the Account Security option.

•    Click on the Phone option.

•    Press on the Change Mobile option. Here you will get the recently linked phone number and the pin code of a country.

•    Click on the recent mobile number and after that, enter a new mobile number.

•    Press on the OK button.

•    Now, you will get the confirmation code on the new mobile number you had entered already.

•    Type the confirmation code on the given column provided by the WeChat to unlink your phone number.

•    In case you have not got any confirmation code on your registered mobile number, then press on the “No verification code received?” section.

•    At last, press on the Submit button to complete linking the new mobile number to the account registered with the WeChat.

•    Now, you have successfully unlink your phone number from WeChat.

Steps to Remove Your WeChat Account

Before you go through the removing procedure of your WeChat account, you should check the following things mentioned below:

•    Recently, you have not changed the WeChat account password or linked any mobile number in the past two weeks.

•    You need to cancel or deactivate the WeChat Pay and no remaining amount should be due.

•    You should remove all the vouchers given in the Cards and Offers column of the account registered with the WeChat.

•    You should unlink the WeChat account from the third-party applications.

After checking all the following options mentioned above, now you can request to remove your WeChat account. In case your request is not accepted by the WeChat, then you need to click twice on the below-mentioned list:

•    Launch the WeChat application.

•    It resembles an olive color symbol with two speech bubbles, and this application is located on the home screen.

•    In case the WeChat application opens the last conversation window, then click on the Back button to go to the current conversation list.

•    Press on the Me button given at the end right-hand side of the display to open the WeChat profile window.

•    Press on the Settings option.

•    Press on the Account Security button.

•    Click on the WeChat Security Center option located at the end of the menu.

•    Press on the Account Cancellation option located at the end of the Security Center window.

•    Press on an olive color Request Cancellation option.

Jeniffer Leio is a Microsoft Office expert and has been working in the technical industry since 2002. As a technical expert, She written technical blogs, manuals, white papers, and reviews for many websites such as office.com/setup.

Source :  

How to Send Messages from Your Apple Watch

If you want to send an important message to someone and you do not have your phone with you, then what will you do? Don’t worry, you can send messages from your Apple Watch by using the messages application in it. You can also choose your native language to send a text or give a response to your messages from that language. Here’s how to send messages from your Apple watch.

Apple Watch

Steps to send messages from your Apple Watch

Sending messages is a great feature of Apple Watch, which permits you to send and receive a text, and this feature is easy to use. In a situation when you have forgotten your iPhone or Android phone, then you can use your Apple Watch to send the important messages to someone. Here are the steps are given below to send messages from your Apple Watch:

•    Click on the Messages application by going to the home screen of the Apple Watch.

•    Click on display firmly option.

•    Press on the New Message option.

•    Click on the Add contact button.

•    Choose the person to whom you wish to send a text.

•    You can find that person by entering the mobile number, through voice or select by going to the phonebook.

•    Now, you need to dictate a text.

•    After that, press on the Send button.

Steps to respond to messages on your Apple Watch

In case someone has sent you a text on the Apple Watch, then you can give a response by following a few steps:

•    Move the Digital Crown to the end of the text.

•    Go down to check the smart replies which are available now.

•    Choose on which way to want to give a response.

Steps to add custom messages responses to Apple watch

In case you do not want to use the smart replies feature of the Apple Watch, then you can edit that feature anytime. To complete this procedure, you need to follow the steps mentioned below:

•    Go to the Apple Watch application on the iOS device.

•    Press on the My Watch option.

•    Choose the Messages option.

•    After that, press on the Default Replies button.

•    On that window, you can type the own phrases by clicking on the Add Reply option.

•    In case you wish to modify the default replies option, then press on the Edit button.

•    You can also remove that option by pressing on the Delete button.

Steps to change dictation language on Apple watch

In case the smart replies feature is not in the native language, then you can change that

option by going to its settings tab. Here’s how:

•    Click on the screen.

•    After that, click on the Choose Languages option.

•    Now, you will get a drop-down list of all the language which are available.

•    To turn on more languages, click on the iPhone Settings option.

•    Choose the General option.

•    Press on the system keyboard.

•    Choose the Keyboards option.

•    Select the language you wish to turn on so that you can send messages from your Apple Watch by using the selected language.

Steps to adjust the on-screen text

You can change the size of the on-screen text on your Apple watch. You can also change the brightness level so that you can get a clear view. Follow the steps mentioned below to adjust the on-screen text:

•    To modify the display and text, you need to choose the Settings option.

•    After that, press on the Brightness and Text Size option.

•    Now, you can change the brightness level, size of the text, highlighting the text, and many more.

Joey Williams is a self-professed security expert; he has been making the people aware of the security threats. His passion is to write about Cybersecurity, cryptography, malware, social engineering, internet and new media. He writes for Norton security products at norton.com/setup.

Source :  

How to Embed a Google Form in an Email

Google Forms provide free service which permits you to make new online polls, surveys, quizzes, questionnaires, and other things. Each of the data is gathered and saved in the Google spreadsheet. In case you wish to embed various Google forms on your site, then learn how to embed a Google form in an email.

Embed a Google Form in an Email

Steps for Adding email  into a Google Form Through Google Scripts


1.    Make a new form by going to the Google Drive. Here are the steps mentioned below to do this procedure:

•    In case you have any Google form, then you can use it for this procedure.

•    If you do not have, then create a new form by going to the Google Drive.

•    After creating a Google form, you have to go to the Google Spreadsheet.

•    It is the spreadsheet which saves all the responses on the Google form.

•    You can complete the procedure as mentioned above by choosing the “View Responses option located on the editor window.

2.    Type the code. Go through the steps listed below to complete this procedure:

•    Open the Tools.

•    Choose the Script Editor option.

•    After the Script Editor gets open, you will get the code mentioned on it.

•    You have to choose the code and after that, try to remove it.

•    Type the code on the given column.

•    You will get the “XYZ” in the third section of the mentioned code.

•    Type the email ID  or an email where you wish to get the data.

•    Make sure that the entered email ID should be in the inverted commas.

•    After that, click on the Control and S keys for storing the code in the selected folder.

3.    Start Settings up the Triggers. Follow the steps given below to finish this procedure:

•    In case you are using the outdated version of the Triggers, then you will notice the Triggers option near the Share button.

•    If you are using the updated version of the Triggers, then you have to click on the Edit button and after that, choose the Current Project’s Trigger option

•    Then, tap on the “Save” button.

•    After that, press on the “Authorize” option.

Here is the additional method to embed a Google form in an email:

Start downloading the Add-on of the Google Forms. Here’s how::

•    You have to start downloading and installing the email notifications for Google form add-on by pressing on the Google forms webpage.

•    Tap on the add-ons symbol located in the Editor window.

•    Select the Email Notifications option.

•    Choose the “Create New Rule” option.

•    Type the information.

•    You need to modify the email notification.

Jeniffer Leio is a Microsoft Office expert and has been working in the technical industry since 2002. As a technical expert, She written technical blogs, manuals, white papers, and reviews for many websites such as office.com/setup.

Source : Embed a Google Form in an Email

How to Join Images Vertically or Horizontally

By joining multiple  images vertically or horizontally, you can make an excellent looking collages and after that, post them on your social media account. In case you are using Mac, then you can use Preview application for combining images vertically and horizontally. If you are using Windows PC, then you can use Microsoft Paint. Here’s how to join images vertically and horizontally.

Join Images Vertically or Horizontally

Steps to Join Images Vertically or Horizontally on Your Mac

•    Go to the first image you wish to start using in the Preview application.

•    Tap on the Edit and Select All option.

•    You have to click on the Copy button because you are not using the duplicate image instead if the original one.

•    Choose the Tools option.

•    Press on the Adjust Size option located in the Preview application.

•    After pressing on that option, it will make an extra space so that the other image can be added.

•    Select the Width section.

•    After that, enter the total width of the images.

•    Just take an example, in case width of each image is of 500 pixels, then you have to type the 1000 pixel into the Width section.

•    If you wish to start joining the images vertically, then you have to adjust the value in the Height section.

•    Ensure that you have gone through the “Scale proportionally” option before clicking on the OK button.

•    Press on the Edit button.

•    Now, you need to Paste for adding the images which you have copied earlier.

•    Transfer the image to the left-hand side for finding a folder for the other images.

•    You do not have to click on the Close button before the transferring process gets completed.

•    Go to the other image and place it into the Preview application.

•    Choose all the images.

•    You have to start copying the second image and transfer the image to the right-hand side of the display.

•    Now, the joining process of the images is completed.

Steps to Join Images Vertically or Horizontally on Your Windows PC

•    Search for the images you wish to join vertically or horizontally.

•    You have to resize the two images so that you will get a good result.

•    The Microsoft Paint will permit you for resizing the two images through the Pixels or Percentage.

•    You need to equal the vertical and horizontal sizes on two images.

•    Pull the rectangle on the right-hand side.

•    Search for the Paste option located in the upper left-hand side of the display.

•    Press on the Tool option.

•    After completing all the steps as mentioned above, choose the “Save As” option.

Joey Williams is a self-professed security expert; he has been making the people aware of the security threats. His passion is to write about Cybersecurity, cryptography, malware, social engineering, internet and new media. He writes for Norton security products at norton.com/setup.

Source : Join Images Vertically or Horizontally

Want to Cancel a Pre-Order on iTunes? Know How to Do it

Apple offers you an option by which one can pre-order things on iTunes, but sometimes users might change their mind and wants to cancel their pre-order on iTunes. Therefore, users can easily do so just by following few simple steps provided by the experts. However, anyone can easily cancel their pre-order wit minimum hurdle and within no time. Below we provide complete procedure with a stepwise guide for how to cancel a pre-order on iTunes in your iPhone, iPad, PC or Mac. No matter which device you used, just follow the instructions and cancel your pre-order on iTunes.

iTunes

Here are a few things that you should consider while canceling a pre-order on iTunes which are as follows:

  • Ensure that you have to cancel the pre-order before any item comes or add into iTunes. If you are too late, then albums and movies have been already released. So, you have to pay for it.
  • During the time you pre-order, the payment isn’t taking directly from your chosen payment method until the items appear on the device, so no one has to wait for refunded money or refund.
  • In some cases, Music albums and TV shows, then you might have to charge for those releases. If some earlier episodes and music tracks have already been released, then you will have to pay for all these things which users already downloaded.

Steps to Cancel A Pre-Order on iPhone

For canceling a pre-order on iPhone is one of the best things one should ever perform when users are on the progress. But before you continue with the process, we suggest you follow the steps in the same sequence as mentioned below to save you from unwanted errors and troubles. Here how to cancel it:

  1. Click on the ‘Settings’ icon to launch it on the screen.
  2. Click on the Apple ID or Username’ option.
  3. After that, click on the ‘iTunes & Apps Store’ option.
  4. Next, press the ‘Apple ID’ and then hit the ‘View Apple ID’ option.
  5. Now, scroll down the list and choose ‘Pre-Orders’ option.
  6. Next, click on the item you wish to cancel pre-order.
  7. Press ‘Cancel’ tab.
  8. Choose ‘Yes’ tab.
  9. Finally, your pre-order is successfully canceled.

Steps to Cancel A iTunes Pre-Order on PC or Mac

For canceling pre-orders on your Mac and PC, you need to install iTunes on your Apple device. Follow the below-given steps in the correct sequence to avoid trouble and successfully cancel your pre-orders. Here how to do it:

  1. Click on the ‘iTunes’ icon to open it on the screen device.
  2. Choose ‘Account’ option.
  3. After that, scrolling down the list appears on the screen and choose ‘Settings’ option.
  4. Choose ‘Manage Pre-Orders’ option.
  5. Now, search for the items you want to cancel pre-orders from the iTunes.
  6. Then, choose ‘Cancel’ option.
  7. Lastly, tap on ‘Yes’ tab.
  8. Finally, your pre-orders have been successfully canceled.

Bob Martin is a self-professed security expert; he has been making the people aware of the security threats. His passion is to write about Cyber security, cryptography, malware, social engineering, internet and new media. He writes for Norton security products at norton.com/setup.

Source : Cancel a Pre-Order on iTunes

Fortnite Season 9: How To Find Secret Battle Star For Season 9 Week

Fortnite season 9 is officially out for all the fans to experience a whole new theme to the title and delve into the realm of future where the entire Fortnite map has massive skyscrapers, malls, and modern destinations to have a real feeling of time traveling to 20 years in future.

fortnite

Season 9 for Fortnite not only includes awesome ambiance but it also provides gamers with an opportunity to unlock some highly spectacular wearables and cosmetics to use in the game.

Season 9 avails players with an option to purchase new Battle Pass which would grant players with a chance to unlock exclusive cosmetics and items. Moreover, players who have access to Battle Pass can opt to complete some additional weekly challenges to avail Secret Battle Star which helps in leveling up the player’s tier.

With every advancement of players in-game tier, new rewards and items get unlocked which players can utilize while battling it out on the Fortnite match. Currently the week one challenge are already live for PS4, Xbox One, PC and Nintendo Switch users and players can accomplish all the seven challenges with ease.

Similar to the previous year, players can also unlock some secondary missions after completing every week’s challenges.  As Discovery challenges in the season 8, players can try to complete Utopia challenges in season 9.

By accomplishing all weekly challenges for season 9, players will be able to view a hint or a clue on the in-game loading screen which would guide players with the location for the hidden Banner or Secret Battle Star.

Players who accomplish all the challenges for week 1 season 9, will be presented with a loading screen with two in-game characters shooting with some massive weapons. By taking a closer look, players will be able to spot some text on the side of the weapon stating I5, I6, J5, J6. Clearly, these are the coordinates of the Secret Battle Star for week 1 of season 9.

By correlating this week’s coordinates from the loading screen, it could be determined that the hinted location is the Lonely Lodge. So players will be required to head towards the Lonely Lodge to find this week’s Secret Battle Star.

Still, players will have to keep in mind that the secret Battle Star would only appear once you have accomplished all the week one challenge and have managed to unlock the loading screen with the hot of the Secret Battle Stars coordinates.

So players should not attempt to go directly to the Lonely Lodge locating as they would fail to spot any Secret Star until they accomplish all the week one challenge. Let’s see what more is in pipelines for Fortnite players as season 9 is expected to include some highly futuristic weapons that include lasers guided hand healed and sonic boom grenades.

Joey Williams is a self-professed security expert; he has been making the people aware of the security threats. His passion is to write about Cybersecurity, cryptography, malware, social engineering, internet and new media. He writes for Norton security products at norton.com/setup.

Source : Fortnite Season 9

Here’s Why You Should Upgrade to Ubuntu 19.04 Disco Dingo

Ubuntu 19.04, codenamed Disco Dingo, is a new release. You may be wondering whether you should upgrade to the latest release or not. Well, this new version boasts better performance and visual improvements. Let’s check out the top reasons to upgrade to Ubuntu 19.04 Disco Dingo.

ubuntu 19.04 disco dingo

  • Improved App Icons

The previous Ubuntu version focused on getting a brand0new look. The release included a brand-new desktop theme along with new icons. It added a lot when it comes to visuals regarding Ubuntu themes.

Ubuntu 19.04 comes with a new and improved background wallpaper, upgraded Yaru GTK, along with better icon theme. The Yaru set of icons change from the previous uniform shapes to different shapes. A few icons are shaped in squircles. A few icons are shaped in the form of circles, and some have their own distinct shape.

  • Fractional Scaling Support

The GNOME desktop environment has been supporting HiDPI scaling in quite a few releases. However, the options for default are restricted.  Users can select between a hundred percent and two hundred percent scaling. In several displays, this implies that the choice is either too minor or too large.

GNOME 3.32 brings a number of options to help the users experiment. However, they do need to overcome a few things. Ubuntu, by default,  is still using the X window server. Its fractional scaling will function on the new Wayland server. Wayland comes preset in Ubuntu 19.04 Disco Dingo, so users can easily make the change from the login screen and turn on the experimental feature.

  • GNOME’s New Desktop Icons Extension

The update to Nautilus 3.32.0, led to Ubuntu losing the capability to display icons on its desktop. For fixing it, Ubuntu 19.04 comes with new desktop icons extension. This extension helps in showing icons on your desktop.

Unfortunately, this replacement is not completely forced. This Desktop Icons extension does not have all the functionality that the users are used to. For example, this new extension does not allow users to drag files on the desktop and drop them into either app shortcuts or app screens.

  • Revamped Application Menus

While many users may not have paid attention to the menu buried below the open app name, it is one of the best functionalities. The app menus have been relocated to each app’s window. Now, they do not show up in the toolbar. This tweak has been done in GNOME, and it is not a design-related decision from Canonical.  Certain apps did keep their corresponding menu in their app window, and this led to inconsistency in the user experience. With the new Ubuntu version, all the apps menu will be in their app’s own window.

  • Better Performance

Ubuntu 19.04 comes with significant performance improvement. It is now easier to scroll and window snap animations. Since the indexing of files is done, file search has become a lot quicker. GNOME Shell along with Mutter help in speeding up the OS. Lags and stutters have decreased by a great deal, and the overall experience has become better.

Joey Williams is a Microsoft Office expert and has been working in the technical industry since 2002. As a technical expert, Robert has written technical blogs, manuals, white papers, and reviews for many websites such as office.com/setup.

Source : Ubuntu 19.04 Disco Dingo

How to Enable Dark Mode on Gaming Consoles

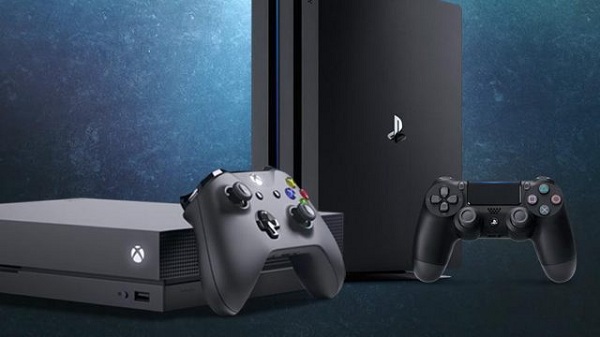
If you are an avid video game player, then you might want to get dark mode on your PlayStation, Xbox, or Switch. No matter which gaming console you have, you can enable the dark mode. Here’s how you can get dark mode on your gaming console.

Gaming Consoles

Enabling Dark Mode on PS4

Sony’s PS4 does not come with an inbuilt dark mode. However, users can personalize their theme to get the look and feel that the dark mode offers.

  1. Firstly, go to Settings located on the upper navigation bar.
  2. After that, find Themes and visit that section.
  3. Select the Default option located in the section.
  4. This will allow you to make changes to the color of the background. Hence in case you are looking for an easy trick to darken your console’s interface, then just choose the black colored background.

In case you are not satisfied with it, then you can simply get a customized theme. To get the theme, visit the PlayStation Store and select a theme that you find suitable. In the Themes menu, you will see a link that will directly bring you to the place where you can look for themes, free or paid.

Enabling Dark Mode on Xbox One

Xbox comes with several strong theme choices. You can change the OS’ interface color, and also add minor tweaks such as Achievement blips.

  1. For getting started, you need to press the Xbox button from the controller.
  2. From the menu that pops up, choose the option for Settings.
  3. Now, you need to choose Personalization.
  4. Select Theme and motion from the list of options.

This will allow you to change to the dark theme. You can also select the option for making your Xbox One change between the light mode and the dark mode depending on a particular time, or according to sunrise and sunset.

In case you wish to synchronize the tiles color and its surrounding accent, then visit the Personalization menu. After that, select my color and background. Lastly, choose My color and make the changes as per your preference.

Enabling Dark Mode on Nintendo Switch

While Nintendo Switch’s interface is set to white by default, you can easily change it to black. When you change its background, the theme will apply to a significant part of the UI, save for a couple of stuff such as eShop and NES application.

  1. First, you need to visit the System Settings. The Settings button is present at the bottom of the primary menu.
  2. Now, you need to scroll down to the Themes section.
  3. Enable the option called Basic.
  4. Now, choose the Black option for activating dark mode on your Nintendo Switch.

Joey Williams is a creative person who has been writing blogs and articles about cybersecurity. He writes about the latest updates regarding mcafee.com/activate and how it can improve the work experience of users. His articles have been published in many popular e-magazines and blogs.

Source : Gaming Consoles