How to Convert VHS Tapes into Digital Copies

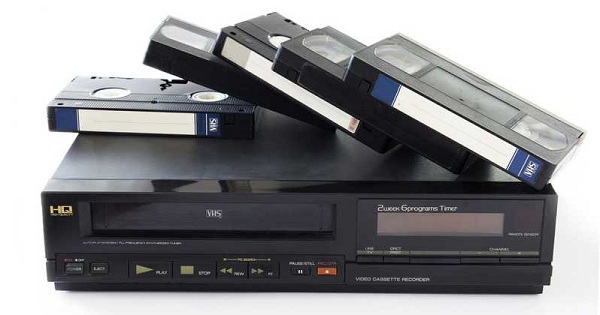
‘Old is Gold’ how true it is. Your old VHS tapes may contain some of the most memorable moments of your life, such as your birthday, college graduation, and more. Converting VHS to a video file on your PC is the best way to keep them safe forever. Saving your VHS tapes to your Mac or PC can also allow you to play them easily and anywhere.  You won’t require your VHS player anymore once all files are converted successfully. It will allow you to throw away old tapes out.

VHS Tapes


There are many offline services out in the market which can be very expensive, but you can easily do it yourself. We will help you to learn the full process of converting VHS tapes into digital copies. So, let’s get started.

What we Need to Convert VHS Cassettes

  • A VCR
  • USB to the composite video cable
  • Software to transfer VHS to Digital video file
  • PC with USB port

If you have VHS tapes, then you probably have a VCR to run them, but if you don’t have, then try asking your friends and loved ones. If you are unable to arrange a VCR, then buy one from your local market.

How to Convert VHS to Digital Video Files on Your PC?

  1. Download and then install a compatible VHS to digital converter application on your Mac or computer.
  2. Now connect your PC to the VCR using the USB to composite video cable.
  3. We will recommend you to get the Elgato’s VHS to digital software because it is effortless to use.
  4. Now read the Elgato’s converter instructions very carefully and follow them to convert your files safely.
  5. You can also rewind your VHS tape to the location where you want to choose the starting point of the video file conversion. It will save you time.
  6. The conversion process will take the same time as your VHS videos. For example, if your VHS tape is only one hour long, then it will take only an hour to complete.
  7. When the conversion is done, save the recorded file to your computer.  In some software, the files can be automatically saved.
  8. Don’t try to disturb your PC during the process. It can result in a corrupted video file or so.

When the converted file is saved successfully to your PC, you can use a video editor to trim and improve the video file. Some video editors can also enhance the quality and resolution, so it’s better to check out a good video editor for making your VHS digitally converted videos even more beautiful.

Once you finalize a video with an editor, then you can upload it to cloud storage such as your Google Drive to keep it safe.

Joey Williams is a creative person who has been writing blogs and articles about cybersecurity. He writes about the latest updates regarding mcafee.com/activate and how it can improve the work experience of users. His articles have been published in many popular e-magazines and blogs.

Source : Convert VHS Tapes into Digital Copies

5 Best Useful Android Apps Under 10 MB

A lot of Android smartphone users face the storage issue. They have to keep limited apps and files to run the phone smoothly. It even becomes almost impossible to download new apps on the smartphone. In that case, those users can choose to use the apps that are not big. Both low-end, as well as high-end Android phone users, can get the apps that are small in size and stay away from storage problems. Not only these apps can be easily downloaded but help save the phone’s battery too.

Android-Apps

Here are the best apps under 10 MB:

1. ColorNote Notepad Notes


ColorNote Notepad Notes app comes as an ideal note-taking app. Its size is not even 1 MB, but still, it packs a lot of decent features. You can create both checklists and notes easily with this lightweight apps. Also, there is an option set reminder on the notes via the in-built calendar of this app. Get this app directly from the Google Play Store app on your Android device.

2. File Pursuit – Discover Everything!

File Pursuit is a dedicated app that is designed for searching and downloading any desired type of file from the internet. It is similar to Google but not the same. You don’t have to leave this app and visit a different website for downloading the desired content. Instead, you can get the same directly from the app. The size of the File Pursuit app is only 6 MB, which makes it easy to download on most Android devices.

3. K-9 Mail

Most of the Android devices have the Gmail app pre-installed on them. It is undoubtedly one of the best apps for accessing emails. But if you are facing storage issue or looking for an alternative, the K-9 Mail app is an excellent option for you. This app comes as a lightweight and small app and takes only 4 MB space on your phone. You can find this app on the Google Play Store and download it from there.

4. Messenger Lite: Free Calls & Messages

Facebook Messenger takes a lot of space on any device. And, most to the smartphone users use this messaging app to connect with their Facebook friends and family. They can’t uninstall it or stop using it instantly. But, the Messenger Lite is an ideal alternative for those users. If you are also one of them, get this lighter version of the Facebook Messenger app on your Android phone.

5. Shuttle Music Player

If you listen to music offline very often on your Android smartphone, then the Shuttle Music Player app is made especially for you. It comes as a lightweight music player app and boasts an outstanding design. The best thing is you even get dark and light theme options in it. For bass lovers, it provides a built-in six-band equalizer that is very powerful. The 5 MB size and a bunch of more exciting features make this app a must-have.

All in all, these are the best five small apps that you must download in your Android smartphone!

Joey Williams is a creative person who has been writing blogs and articles about cybersecurity. He writes about the latest updates regarding mcafee.com/activate and how it can improve the work experience of users. His articles have been published in many popular e-magazines and blogs.

Source : Android Apps

How to Download YouTube Videos on iPad

It isn’t always possible to stream videos online. Sometimes, due to lack of internet or other reasons, you may not want to stream YouTube videos online. In such cases, you can download YouTube videos to watch later. Here’s how you can download YouTube videos on your iPad.

youtube

Download Documents 6

Here is the process of downloading Documents 6 on iPad. Follow the instructions carefully.

•    First, you will have to launch the App Store on your iPad.

•    After that, click on the search bar.

•    Then enter Document 6 in your search bar.

•    Now, click on the “Documents by Readdle” result.

•    Click on GET and if you use your touch ID then type it.

•    After installing, tap on the Home Button.

Getting  a Video’s URL

Here is the process of getting a video link on YouTube. Follow the instructions carefully.

•    First, you will have to launch the YouTube application.

•    After that, enter the video name into the search bar.

•    Then choose a video that you want to download in your iPad.

•    Now, click on the share option.

•    After that, click on Copy Link option.

•    Then tap the Home button.

Download the Video

Here is the process of downloading videos on YouTube. Follow the instructions carefully.

•    First, you will have to launch Documents 6 application in your iPad.

•    After that, you can click on Documents 6 browser.

•    Then you can enter http://www.savefrom.net in your search bar.

•    Now, you can paste the link here.

•    There is the highest video quality is already set by default, and you can click on Download.

•    Now, click Save.

Transfer the video to the Files App

Here is the process of transferring the video on YouTube. Follow the instructions carefully.

•    First, you will have to launch Documents view in your iPad.

•    After that, click Downloads to open downloaded files.

•    Then identify your video in downloaded files.

•    Now, click three horizontal dotted icons in the bottom right-hand side corner of your video’s thumbnail icon.

•    Click on share option.

•    Then select to Save to Files option.

•    Now, transfer the video to your Files application.

Transfer the Video to the Camera Roll

Here is the process of transferring the video to the camera roll on YouTube. Follow the instructions carefully.

•    First, you will have to launch the Files app on your iPad.

•    After that, click on Browse.

•    Then you should open On My iPad folder.

•    Now, select the video that you wish to move to the camera roll.

•    Thereafter click on Share option.

•    Then click on Save Video.

On YouTube Red

Here is the process of using YouTube Red. Follow the instructions carefully.

•    First, you will have to launch the YouTube application and click on SIGN IN.

•    After that, click on your Google profile picture.

•    Then select “Get YouTube Red” option.

•    Now, click on TRY IT FREE for 30 days trial.

•    After that, enter your Apple ID or Touch ID.

•    Click OK when prompted.

•    Then you should search for a video.

•    Choose a video.

•    Click on Download but before this, you can choose the quality of the video.

•    Now, click on OK and hit DOWNLOAD.

Joey Williams is a creative person who has been writing blogs and articles about cybersecurity. He writes about the latest updates regarding mcafee.com/activate and how it can improve the work experience of users. His articles have been published in many popular e-magazines and blogs.

Source : Download YouTube Videos on iPad

8 Ways to Take Care of Your Laptop

A laptop is a very essential gadget because it is portable and can be carried easily. If you have a laptop, then you must take care of it because if you don’t do this, then one small incident can damage your all important files and documents. So, here are some ways to protect your laptop.

Laptop

1. Keep your Laptop Covered

If you want to protect your laptop from scratches, drops, and damages, you must carry a laptop bag, laptop case, or laptop sleeve, etc. As our essential documents and data is saved in laptops, it is necessary to keep the laptop covered to protect it from damage.

 2. Taking Care of Your Battery

Batteries are a necessary part of the laptop, and usually, the battery life is just a few years. That’s why we must take care of the battery. There are several reasons behind quick battery drainage. Hence, you need to take proper measures to protect your battery.

3. Get an Antivirus and Firewall

Everybody wants to protect their essentials documents and confidential files from virus or spyware. That’s why we must use antivirus and firewall. But make sure it is updated because updated antivirus has the latest security features.

4. Eat and Drink Safely

You have no idea about how many computers are damaged accidently because of food and drinks. Liquid things damage the laptop internally, and this creates a big problem. So, users should avoid spilling food and beverages on the laptop.

5. Turn off Unnecessary Programs

Quit the applications which you are not using at the moment. Multiple applications take so much load of your computer. When you close unwanted apps, your laptop will start working faster.

6. Always Keep Your Laptop Cool

Ofte, we use a laptop on the bed at home, and this is also one of the reasons for overheating. Because the bed is a soft surface, that’s why airflow is blocked and the laptop starts heating. So, always ignore the smooth surface and try to find a hard surface to get the excellent performance of your laptop.

7. Always Keep Your Laptop Updated

If you want the latest feature with a bug fix, then you must update your laptop. Because if you did not do it, your laptop performance will get poorer day by day. And also if the laptop is running on an old version then it’s harmful for your laptop because when you update your laptop, the security feature is also upgraded.

8. Don’t Open Multiple Programs and Tabs at Once

If you are using a lot of programs at once, then sometimes your laptop will slow down or crash. It can’t take the load so much at once. Hence, do not open a lot of programs at the same time.

Joey Williams is a creative person who has been writing blogs and articles about cybersecurity. He writes about the latest updates regarding mcafee.com/activate and how it can improve the work experience of users. His articles have been published in many popular e-magazines and blogs.

Source : Laptop

How to Display or Download Pictures to Your Digital Frame

Pictures capture all the good and bad moments of our and very helpful and pleasing at times. Nowadays, instead of real photos, people choose to see their pictures on their smartphone, computer, or digital frame’s screen. If you wish to display your favorite images on a digital frame, you will have read till the end to know how you can do it. The transfer process depends upon the number of images that you wish to transfer though and might take a while. Let’s have a look at a few of the best display or transfer methods.

Digital Frame

Through a Flash Drive

1. Plug your flash drive in a free USB port of your computer.

2. Go to the image or photo library of your computer.

3. You can now copy and then paste or drag and then drop photos from the folder to the dedicated flash drive.

4. Once you are done with transferring files, eject and then remove the flash drive from your computer.

5. Now, connect the same flash drive with your digital frame and then follow the instruction that you see on screen. The process is different from one digital frame to another. Your file will be saved in the internal storage of the digital frame.

6. If you don’t wish to save the photos on the internal storage, you can choose to keep the flash drive connected to let the digital frame access and display photos. Eject and then remove the flash drive when you don’t want to show any picture on the digital frame.

Through a Memory Card

The process is easy if you own an SD card. You need to remove the SD card from any particular device and put it inside the digital frame. Follow the instructions that appear on screen accordingly for displaying pictures or saving them on the digital frame’s internal storage.

When it comes to a microSD card, you need to have a memory card reader of microSD to SD memory card adapter. If you don’t know about them, the microSD to SD adapter is usually shaped as an SD card. You will have to put the microSD card inside the adapter and connect the adapter with the digital frame and go through the instructions available. And, the memory card reader is almost the same as the flash drive. It asks you to insert the microSD card inside the reader and then connect with the digital frame. You can then follow the instructions either for saving or displaying pictures.

Through a Computer

1. Build a connection between your computer and digital frame with the use of a dedicated USB cable.

2. If you can’t see the folder of the digital frame instantly, open it.

3. Then go the dedicated folder where photos – that you desire to transfer are stored.

4. Select all the images you want to see or have in the digital frame.

5. You can now either choose to copy and paste or drag or drop the selected files in the folder of the digital frame.

6. After transferring the desired pictures, either select the Eject option or Safely Remove Hardware before removing the digital frame.

7. Disconnect both digital frame and computer from each other and access your digital frame to ideally show the downloaded pictures.

In this way, you can easily display or transfer pictures on your digital frame!

Joey Williams is a creative person who has been writing blogs and articles about cybersecurity. He writes about the latest updates regarding mcafee.com/activate and how it can improve the work experience of users. His articles have been published in many popular e-magazines and blogs.

Source : Download Pictures to Your Digital Frame

How to Discover New Music on Apple Music

Apple Music consists of a massive amount of songs and music albums. It is used by millions of Apple users worldwide for listening to their favorite music. You even have to pay a dedicated amount for using it – after the trial period ends – but it is worth it. From old classics to new music, you can enjoy everything perfectly with this app. All these things make it one of the best music streaming services. Here are the ideal ways to discover new music in Apple Music.

apple-music

1. Explore the Intro To playlists

Apple Music is undoubtedly the best spot for finding all type of music. Go to the search section in Apple Music and select the ‘Intro to’ playlists that are curated by Apple’s music editors. For example, if you want to listen to Bob Dylan, choose the Intro to Bob Dylan playlist for discovering the best music from him. Though there are plenty of playlists available for you over there. You can choose the one that you like to get started with a new artist or music.

2. Keep updating your song library

The songs that you search, love, and add in your song library in the app matters the most. Because Apple Music gives you music suggestions according to that, regardless of selecting your favorite genre in the app. Hence, it is essential to keep doing the same. The more you explore the Apple Music app, the better the music suggestions you will get. You need to refresh the For You Section in the app as the music suggestions will be available there for you.

3. Explore playlists according to mood and by magazines

You can check out the playlist of influential music magazines like Rolling Stone to hear the hottest tracks in recent times. Also, there are playlists according to the activity that you are doing currently as well. Go the Activities option and choose the ideal playlist to listen to music while working, relaxing, or even working out.

4. Listen to Beats 1

It is easy to find a lot of good new tracks buzzing around through Beats 1. You can add the song to your music collection through a few easy steps by listening to it. From hip hop to electronic to country, all type of music is played non-stop on this 24/7 station. The best thing is you get no ads and chats between artists and the hosts are pretty entertaining too. There are various other streaming radio stations for exploring new music.

So, these are some of the best ways for discovering great new music on Apple Music.

Joey Williams is a creative person who has been writing blogs and articles about cybersecurity. He writes about the latest updates regarding mcafee.com/activate and how it can improve the work experience of users. His articles have been published in many popular e-magazines and blogs.

Source :  

How to Enable Dark Mode on Gaming Consoles

If you are an avid video game player, then you might want to get dark mode on your PlayStation, Xbox, or Switch. No matter which gaming console you have, you can enable the dark mode. Here’s how you can get dark mode on your gaming console.

Gaming Consoles

Enabling Dark Mode on PS4

Sony’s PS4 does not come with an inbuilt dark mode. However, users can personalize their theme to get the look and feel that the dark mode offers.

  1. Firstly, go to Settings located on the upper navigation bar.
  2. After that, find Themes and visit that section.
  3. Select the Default option located in the section.
  4. This will allow you to make changes to the color of the background. Hence in case you are looking for an easy trick to darken your console’s interface, then just choose the black colored background.

In case you are not satisfied with it, then you can simply get a customized theme. To get the theme, visit the PlayStation Store and select a theme that you find suitable. In the Themes menu, you will see a link that will directly bring you to the place where you can look for themes, free or paid.

Enabling Dark Mode on Xbox One

Xbox comes with several strong theme choices. You can change the OS’ interface color, and also add minor tweaks such as Achievement blips.

  1. For getting started, you need to press the Xbox button from the controller.
  2. From the menu that pops up, choose the option for Settings.
  3. Now, you need to choose Personalization.
  4. Select Theme and motion from the list of options.

This will allow you to change to the dark theme. You can also select the option for making your Xbox One change between the light mode and the dark mode depending on a particular time, or according to sunrise and sunset.

In case you wish to synchronize the tiles color and its surrounding accent, then visit the Personalization menu. After that, select my color and background. Lastly, choose My color and make the changes as per your preference.

Enabling Dark Mode on Nintendo Switch

While Nintendo Switch’s interface is set to white by default, you can easily change it to black. When you change its background, the theme will apply to a significant part of the UI, save for a couple of stuff such as eShop and NES application.

  1. First, you need to visit the System Settings. The Settings button is present at the bottom of the primary menu.
  2. Now, you need to scroll down to the Themes section.
  3. Enable the option called Basic.
  4. Now, choose the Black option for activating dark mode on your Nintendo Switch.

Joey Williams is a creative person who has been writing blogs and articles about cybersecurity. He writes about the latest updates regarding mcafee.com/activate and how it can improve the work experience of users. His articles have been published in many popular e-magazines and blogs.

Source : Gaming Consoles

7 Best Photo Editing Apps for iOS Devices

When we compare Android with the iPhone, the camera of the iPhone makes it the best. For adding more excitement to the captured photos, you can use photo editing apps in your iPhone. On that note, let’s explore the best photo editing apps available for iOS device today.

Appsds

Here are the best ones:

1. Snapseed

Google’s Snapseed is one of the best apps for editing photos on your iOS device. It comes with an exciting and easy to use user interface. You only need to choose an ideal picture, and all the editing options will be there for you. The filter options provided by Google are easy to understand and simple to use. Give a completely new look to your photos with the Snapseed app.

2. Adobe Photoshop

Adobe Photoshop is already a popular app for desktop users, but it is ideal for phone users as well. If you are familiar with the features of the desktop version of Photoshop, it will be easy for you to use the mobile version of Adobe Photoshop. Its filter section makes it stand out from the rest. Even, it features built-in social media platform where you upload your works and check others. You can easily add stickers, create double exposure, eliminate red eyes, and do a lot more with the Adobe Photoshop iOS app.

3. Photofox

Photofox is an ideal photo editing app for iOS users. It offers an image search engine that comes powered by Pixabay, which makes it different from others. You can add photos from the Pixabay search or the gallery of your phone. You can easily combine two pictures and make it one using this app. Other than this, you can add filters, text, stickers, frame, colors, and more. If you need free images from the web for using, the Photofox app is the best solution for you.

4. Afterlight 2

The simple yet exciting user interface of Afterlight 2 makes it one of the best photo editing apps. Once you open this app, it asks you to select the desired photos and takes you directly to the editing section. It has various filter options to make you phots cooler than ever. You get the option to add stickers and quotes to your pictures as well. Get the Afterlight 2 app from the iOS store.

5. Prisma

If you love photos with cartoonish effect, the Prisma app will be ideal for you. Though, this app directly takes the user to the camera interface for capturing what’s around. You can apply the exclusive filters offered in this app. It is almost the same as Instagram and allows you to connect with other users and explore their feed. Prisma was available for iOS users only, but now it is available on Android too.

6. Polarr

When it comes to the oldest photo editor, Polarr is one of them. It provides all the editing options on its home screen and lets you easily edit photos. You can do a lot with your photos – add filters, make adjustments, apply effects, and more – using this photo editor.  However, most of the editing options are paid ones in it. It will be essential for you to get the premium version for using this app ideally.

7. Apple Photos

The built-in photo editor in your Apple device can work pretty decent for you too. It has been through plenty of changes from time to time with every update. You can find more editing options in your built-in app now. To check the cropping tools and basic filters, tap the edit option available on the app. You can even add your signature with the stock photo editor in your phone.

Conclusion

For better impact, you can edit photos before showing to the world. If you use an iOS device, there are multiple photo editors available in the market for you. This blog discusses the best photo editing apps that you can use in your iOS device.

Joey Williams is a creative person who has been writing blogs and articles about cybersecurity. He writes about the latest updates regarding mcafee.com/activate and how it can improve the work experience of users. His articles have been published in many popular e-magazines and blogs.

Source : Photo Editing Apps for iOS Devices

How to Fix Frequent Outward Game issues

Outward is a popular role playing game which you can play in your free time. While playing this fun game, some users have started facing some problems. Follow the instructions mentioned below to fix frequent Outward games issues.

Outward

Steps for Fixing the Outward Game Crashing

1.    Check the Minimum System Requirements

Minimum Operating System Requirements

•    Windows 7

•    Windows 8

•    Windows 10

Recommended Operating System Requirements

•    Windows 7

•    Windows 8

•    Windows 10

2.    Using Program Compatibility Mode

•    Open the “Start” menu.

•    You have to right-click on the “executable file” of Outward game.

•    Open the Outward game in the “Compatibility Mode” of windows.

3.    Change Graphics Card Settings

•    Open the “Start” menu, and after that, you need to right-click on the blank space.

•    Choose the “NVIDIA” control board by going to the list of available options.

•    After the “NVIDIA” control board gets open on the screen, launch the left-hand side drop-down menu and after that click on the “Three- dimensional Settings” option to view the content in large size.

•    Then, select the “Manage three-dimensional Settings” option.

•    Go to the right-hand side of the control panel and after that, go down till you get the “Power Management” option.

•    You need to set “NVIDIA” graphics card settings for getting maximum power.

How to Troubleshoot the Split Screen Controller Not Working in Outward?

Go through the steps mentioned below to fix the split screen controller not working in Outward game issues:

Steps to Fix Display Bugs in Outward Game

•    You have to right-click on the blank space on the screen.

•    Choose the “Display Settings” option by going to the drop-down menu.

•    Press on the pull-down menu under the “Resolution” option.

•    Choose a suitable resolution for the display when considering a high refresh gaming monitor.

Steps to Fix Dropped Frames in Outward Game

•    You have to right-click on the blank space on display.

•    Now, you need to choose “NVIDIA” control board by going to the options which are available now.

•    Open the left-hand drop-down menu and after that, tap on the “Three-dimensional Settings” option.

•    In case “Dynamic Super Resolution” is available on the screen now, then you have to disable it.

How to Fix Black Screen Issues?

Here are the methods are given below to fix the black screen issues:

1Uninstall NVIDIA Graphics Driver

•    Press the Control+ Shift+ Escape keys together. It will open the “Task Manager” window.

•    Tap on the “File” and after that, choose “Run New Task” option.

•    You have to enter the text “devmgmt.msc” in the given box and after that, press on the “OK” button.

•    After the “Task Manager” gets open on the screen, you have to press on the “Display Adapters and expand its contents” option.

•    Now, you have to the right -click on the NVIDIA graphics card and after that, choose the “Graphics Driver” which you like to uninstall.

•    Once you completed the uninstallation procedure of the NVIDIA graphics driver, then you need to start the system again.

2. Turn Off Fast Startup

•    Click on the Windows+ S keys together.

•    Enter the “Control Panel” in the search bar and after that, press on the “Enter” button.

•    Tap on the “System and Security” option.

•    Press on the “Power Options” button.

•    Open the left-hand side of the Control panel and after that, tap on the “Choose what the power buttons do.”

•    Tap on the “Change settings that are currently unavailable” URL.

•    Ensure that the “Turn on fast startup” button should be not selected.

Joey Williams is a creative person who has been writing blogs and articles about cybersecurity. He writes about the latest updates regarding mcafee.com/activate and how it can improve the work experience of users. His articles have been published in many popular e-magazines and blogs.

Source : Outward

How to Add Email Accounts to Outlook

It is good to have many email accounts with different providers. You can use all the accounts at one time by switching the account to another. You need to follow the simple steps given below to add email accounts in Outlook.

Outlook

Steps to Add Yahoo to Outlook

Here are the steps are given below to set up the Yahoo mail in Outlook, follow the steps to start the procedure:

•    Sign in to the account which you had created in Yahoo.

•    Tap on the “name” located in the top right-hand side of the display and after that, choose “Account Info” option.

•    Choose the “Account security” located in the “personal setting webpage.”

•    Ensure that you should permit applications for using less “log in” option which is turned on.

•    After that, go to the “Outlook” page.

•    Tap on the “File” option located on the upper left-hand side of the display.

•    Tap on the “Add Account” button given on the “Account Info” webpage.

•    Press on the “Radio” option nearby the “Manual setup or additional server types” option.

•    After that, you need to press on the “Next” button.

•    Choose “POP or IMAP” option and after that, tap on the “Next” button.

•    You need to enter all the detail required.

•    Select the “IMAP” option to use for the account purpose.

•    Use the link http://www.imap.mail.yahoo.com for the “Incoming Mail Server.”

•    Use the link http://www.smtp.mail.yahoo.com for the “Outgoing Mail Server.”

•    It will automatically enter your username in the required field.

•    Enter the password which is registered with the Yahoo account.

•    Ensure that you should check “Remember Password” checkbox.

•    After that, tap on the “More Settings” option.

•    Choose the “Outgoing Server” option located in the coming display.

•    Go through the checkbox nearby the “My outgoing server required authentication” option.

•    Choose the “Use same settings as my incoming mail server” option.

•    After that, choose the “Advanced” option.

•    Below the things you had removed, go through the checkbox nearby the “Purge items when switching folders while online” option.

•    Then, press on the “Ok” button.

•    Tap on the “Next” option located in the “Account Info” webpage.

•    After completing the above-mentioned step, press on the “Close” button to shut down the window.

Steps to Preview Email Messages in Yahoo Mail

Go through the steps listed below to preview email messages in Yahoo Mail:

•    Go through the email ID which is linked with your Yahoo account located in the left-hand side of the Outlook mail display for viewing the mail.

•    Below the Yahoo page, tap on the “Inbox” option.

•    The users will get all the messages in their display which you can see by using other Yahoo accounts they have placed in the Outlook.

•    They can allow Outlook for sending and receiving messages from it when they are using other Yahoo accounts.

Steps to Add Gmail to Outlook

Here are the steps are given below to set up the Gmail in Outlook:

•    Sign in to the account which is linked with the Gmail and after that find the “Gear” symbol located in the top right-hand side of the display.

•    After finding it, tap on the “Gear” symbol.

•    Choose the “Settings” option by going to the pull-down menu.

•    Choose the “Forwarding and POP or IMAP” option located in the next display and make sure that the “IMAP status” should be turned on.

•    Tap on the “Save Changes” button.

•    Go to the “Google’s less secure applications” webpage and make sure that “less secure applications” should be turned on.

•    After that, go to the “Outlook” page.

•    Tap on the “File” button.

•    Press on the “Add Account” option located in the “Account Info” webpage.

•    Tap on the option nearby the “Manual setup or additional server types” button given on the next display.

•    Press on the “Next” button.

•    Choose “POP or IMAP” option and after that, tap on the “Next” button.

•    Enter all the required detail.

•    Enter the password registered with the Gmail account and ensure that you should check the “Remember Password” checkbox.

•    Tap on the “Next” button located on the “Account Info” webpage.

•    After completing the procedure, tap on the “Close” button.

Joey Williams is a creative person who has been writing blogs and articles about cybersecurity. He writes about the latest updates regarding mcafee.com/activate and how it can improve the work experience of users. His articles have been published in many popular e-magazines and blogs.

Source : Add Email Accounts to Outlook